

Do you have a requirement to measure the voltage, current and power drawn from a battery or by a device using a Raspberry Pi?
Perhaps you are also seeking to measure energy consumed (watt/hours) or charge (amp/hours) to determine state of charge (SoC) like a coulomb counter?
If the answer is yes, then one of the easiest ways of achieving this is via a dedicated I2C sensor wired into the Raspberry Pi.
Hardware
One of the more popular sensors for measuring voltage and current is the digital power monitors from Texas Instruments. At the time of writing, the portfolio included 26 parts.
To keep things simple, we have standardised on two versions:
- INA226 – 36V, 16-bit, ultra-precise i2c output current/voltage/power monitor
- INA228 – 85V, 20-bit, ultra-precise, I2C output current/voltage/power/energy/charge monitor
The INA226, with a maximum voltage of 36V is perfect for the less challenging 12V battery application. It accurately measures current and voltage to derive instantaneous power. But, It does not accumulate current or charge in hardware.
For more demanding applications like 48V battery banks, we have been using the INA228. Not only does it support a wider voltage range, it will accumulate energy and charge – so you don’t have too in software.
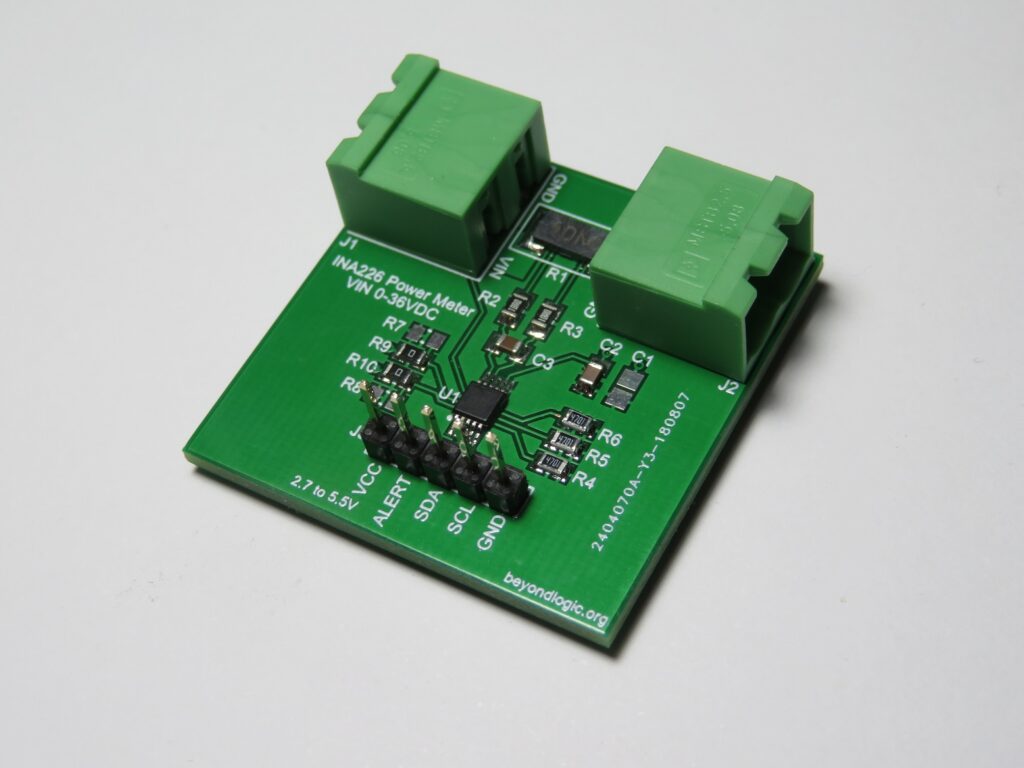
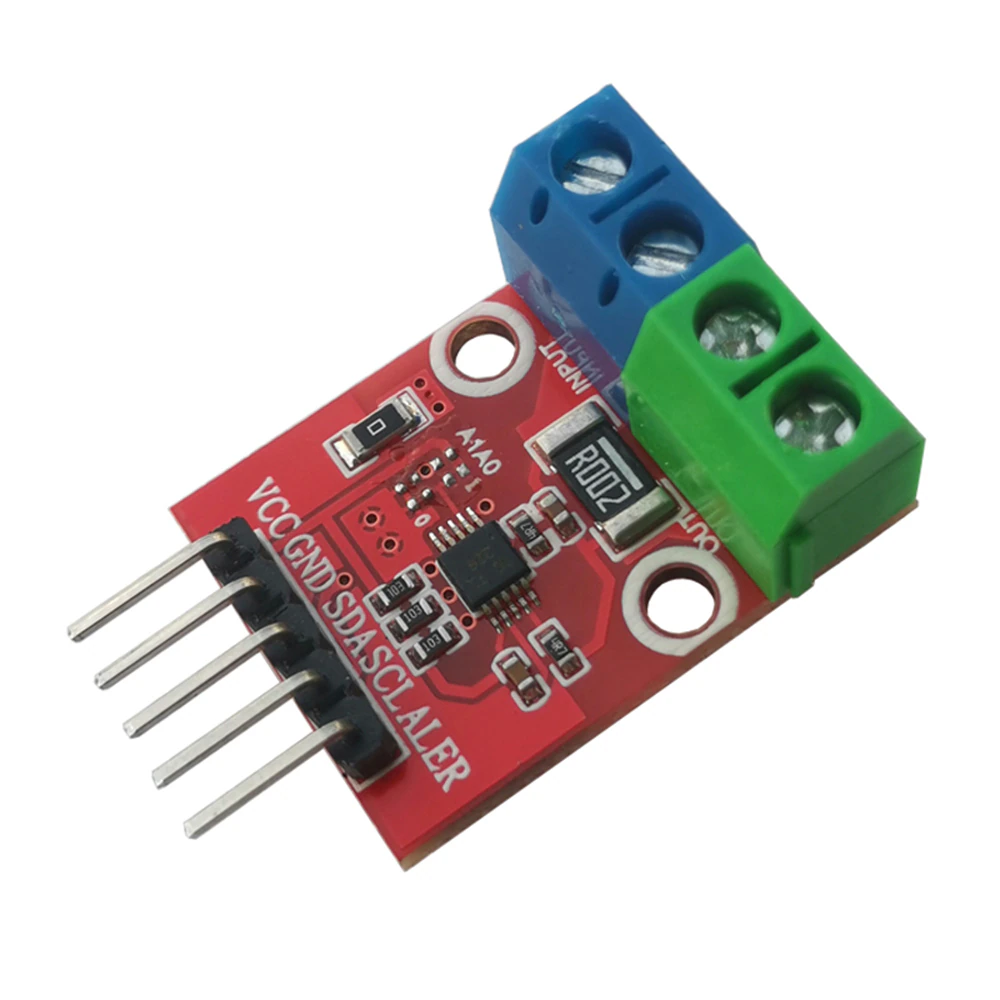
We have soldered both the INA226 and INA228 to a breakout board featured here. However, various breakout boards are available via the normal outlets like Aliexpress and eBay. When we first designed the breakout board in August 2018, choice was limited and most breakout boards didn’t have suitable terminal blocks for connecting cables. Five years later, there are some better modules on the market – here & here.
Do you need a higher current? Here is a teaser of a soon to come INA228 fitted to a
Riedon RSB-200 Current Shunt (200A).
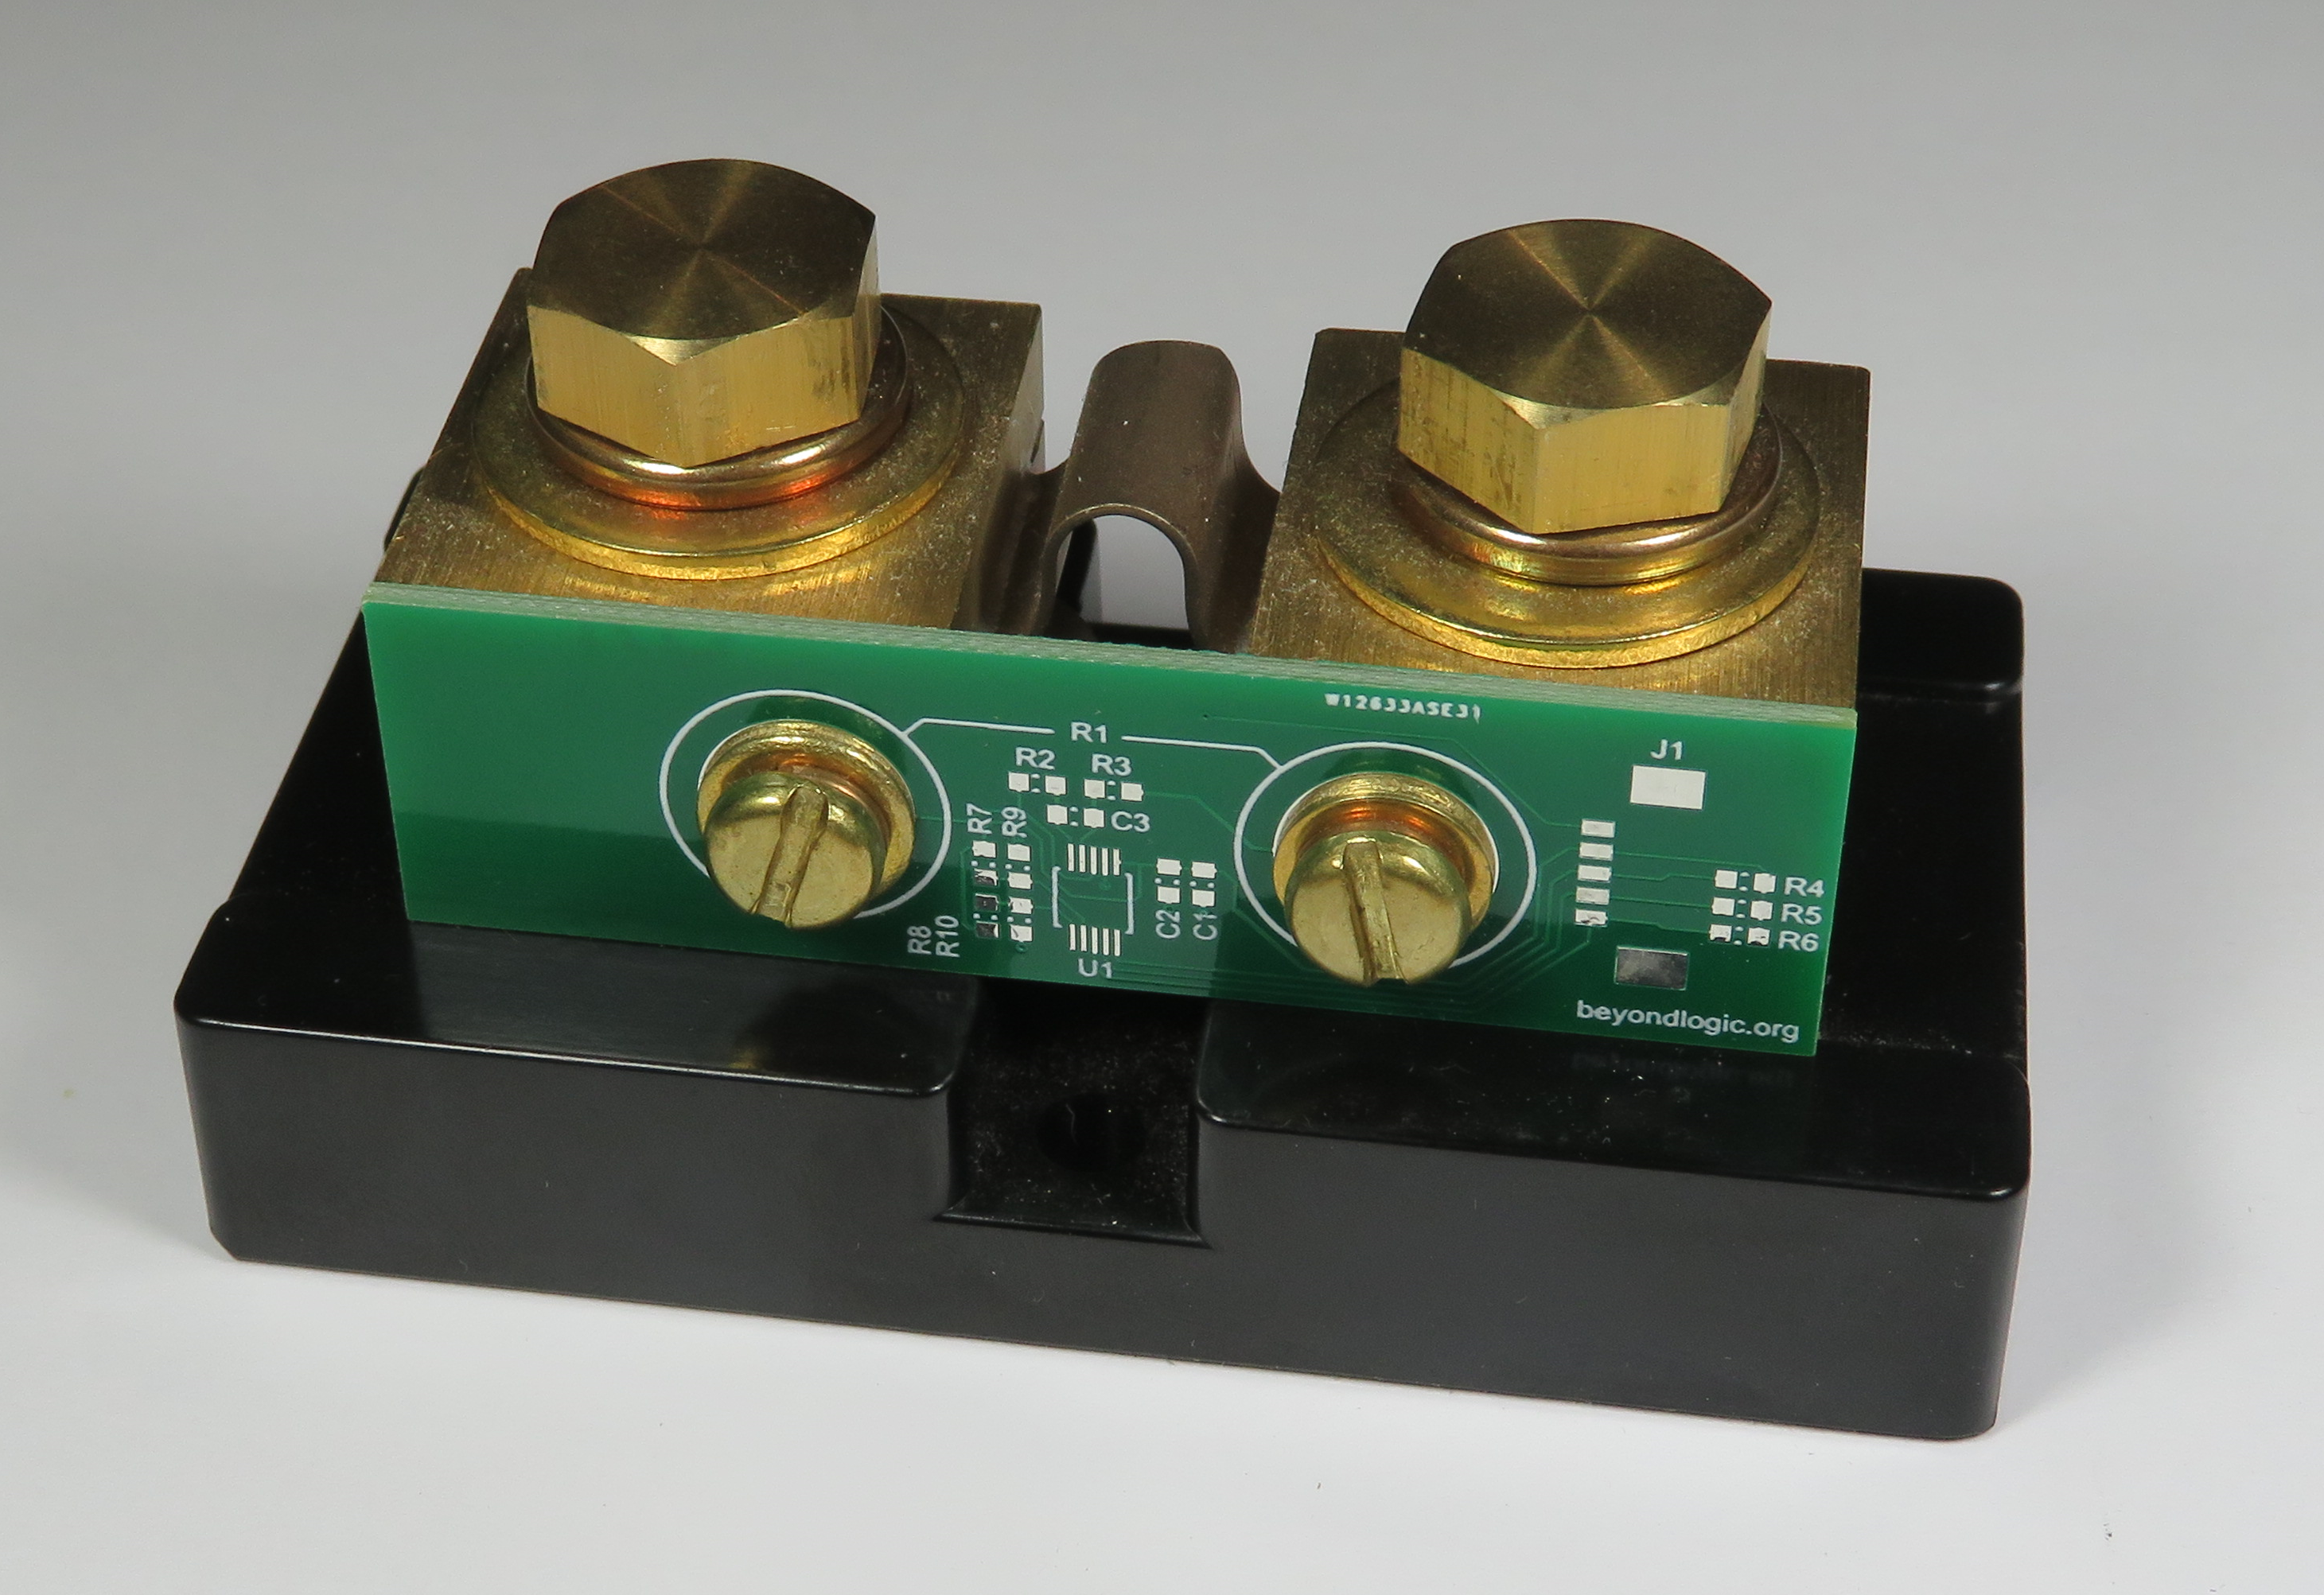
The chip shortage has seen this project parked, but the parts are now starting to come back into stock.
Connection Details
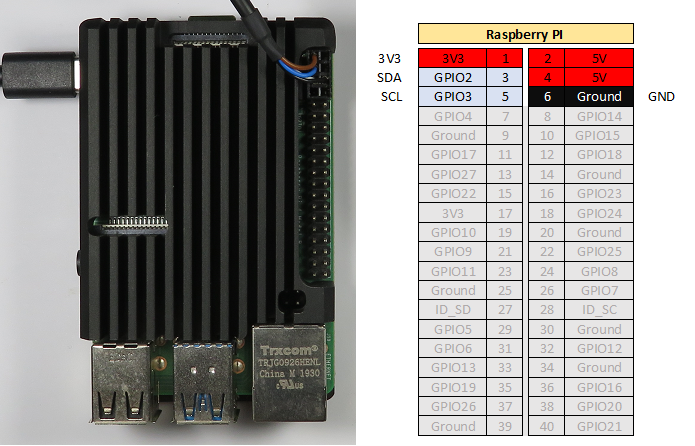
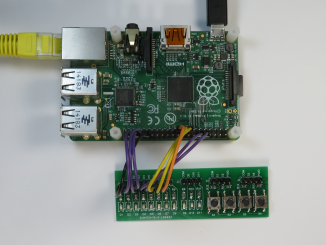
The digital power monitors connect to the Raspberry Pi via the I2C port. We also power the device via 3.3V obtained from the Raspberry Pi. The good thing is all these connections are close by on the 40 pin connector, so we only need a small 2×6 pin header.
Example Output
Below is the example output you can expect when executing the software. The source code is available, so you can easily customise it to your own application.
INA226
Power Meter

Initialising INA226 at addr 0x40 on /dev/i2c-1
Manufacturer ID:        0x5449
Die ID Register:        0x2260
Configuration Register: 0x4527

Voltage = 12.30 V Current = 1.01 A Power   = 12.39 W
INA228
Power Meter

Initialising INA228 at addr 0x40 on /dev/i2c-1
Manufacturer ID: 0x5449
Device ID:       0x2281

Voltage:         12.310 V
Die Temperature: 17.5 degC
Shunt Voltage:   10.026 mV
Current:         2.005 A
Power:           24.685 W
Energy:          0.00007 Wh
Charge:          0.00001 Ah
Building
To run the above software, you will need to download the source code from the GitHub repository and compile it. Normally the build tools are installed on Raspberry Pi OS, however the git executable is not. First, install git:
sudo apt-get install git
Now with GIT installed, download a copy of the repository and build:
git clone https://github.com/craigpeacock/Linux_PowerMeter.git
cd Linux_PowerMeter
make
To run, type ./powermeter
./powermeter
Power Meter
https://github.com/craigpeacock/Linux_PowerMeter
Usage: powermeter [options]
Options:
        -m <model>              226 or 228
        -l <filename>           Log to file
        -p <i2c device>         I2C port
        -a <i2c addr>           I2C address of power meter (in hex)
        -r                      Reset device

pi@PiZero:~/Linux_PowerMeter $ i2cdetect -y 1
0 1 2 3 4 5 6 7 8 9 a b c d e f
00: — — — — — — — —
10: — — — — — — — — — — — — — — — —
20: — — — — — — — — — — — — — — — —
30: — — — — — — — — — — — — — — — —
40: 40 — — — — — — — — — — — — — — —
50: — — — — — — — — — — — — — — — —
60: — — — — — — — — — — — — — — — —
70: — — — — — — — —
pi@PiZero:~/Linux_PowerMeter $ ./powermeter -m 226 -p 1 -a 0x40
Power Meter
https://github.com/craigpeacock/Linux_I2C
Initialising INA226 at addr 0x40 on 1
Failed to open I2C port
What might be the source of problem?
For me, I2C-port means “-p /dev/i2c-1”.